Plug in your CR-4 with the supplied Micro USB cable. Windows will automatically detect and install the correct driver. Depending on your model of CR-4 the device may show up as “Arduino Micro” (CR-4) or “Serial USB TTL” (CR-4 Lite).
To use the CR-4 you will need to install SimHub. You can download the latest version here.
Once downloaded, extract and install SimHub making sure to install the .net libraries if you don’t have them already.
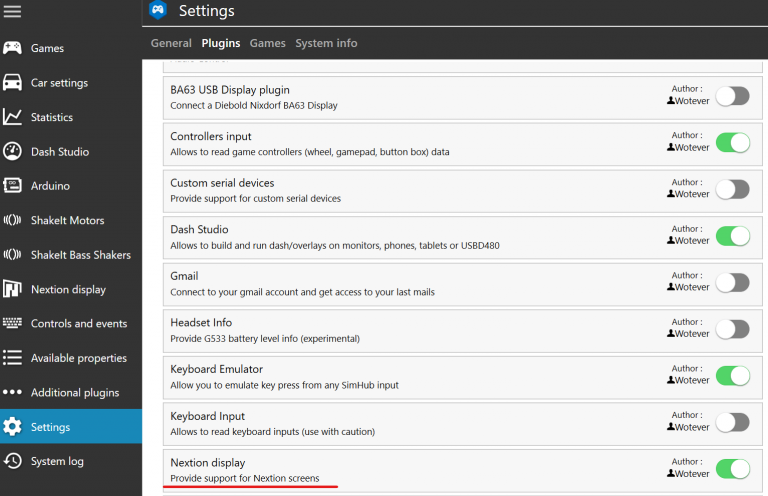
Open SimHub go to Settings, click the Plugins tab and enable the Nextion plugin
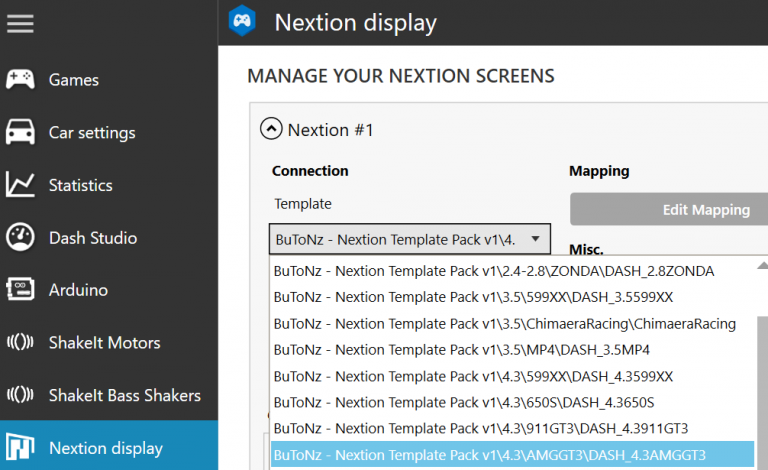
Now Click on the Nextion Display icon on the left, and the Nextion setup page will be displayed. Expand Nextion #1 and from the Template dropdown menu select BuTonZ – Nextion Template Pack v1\4.3\599XX\DASH_4.3599XX, depending on what dash is installed. This is the default dashboard installed by us, but we will show you how to replace it later in the instructions.
Now select the correct COM port from the list – If you’re not sure which one is the CR-4, open Device Manager on your PC and find the Arduino Micro (or Serial USB TTL) and check it’s properties to see the COM port. Now click Apply and make sure the “switch” in the top right is on (green). Now run your game and you should begin seeing telemetry on the screen. Simply touch the screen in the bottom right corner to switch pages. This completes the basic setup for the CR-4 Lite. Scroll down for instructions on uploading new dashboards to the device.
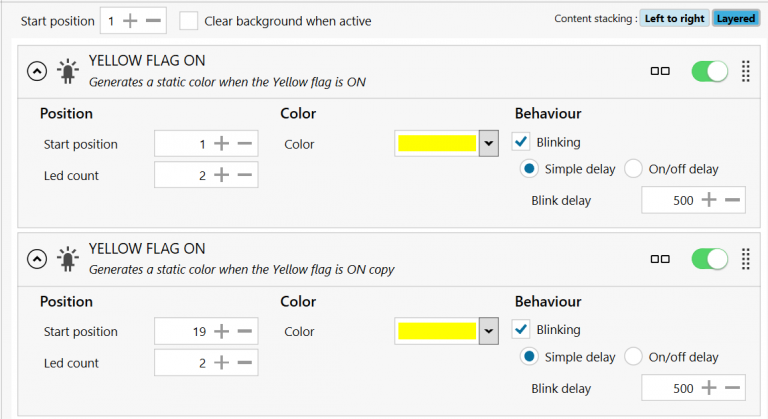
If you have a CR-4 with LEDs, click Edit LED Layout. Here you can configure the LEDs on your device, and they are set up like this – LEDs 1-2 are the left flag lights, LEDs 3-18 are the RPM/Rev LEDs, and LEDs 19-20 are the right flag lights. SimHub comes with some default setups for RPMs and lights, but you will need to modify them to take advantage of the side flags on the CR-4. Below is how to configure the Yellow flag to show on both sides :
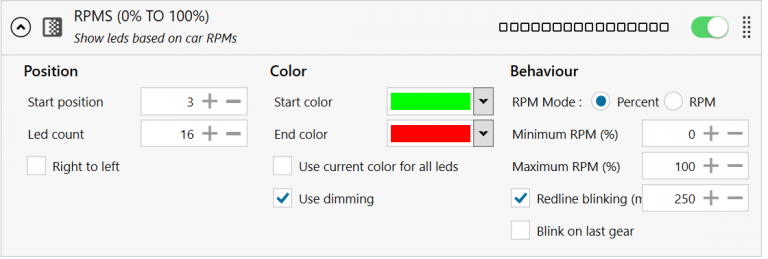
You will also need to modify the RPM and other default configurations so as not to include the Flag lights. Below is an example of how to configure the RPM lights correctly. Note the Position, starting at LED #3 and continuing for 16 LEDs.
You are now free to configure Simhub for however you’d like your LEDs to work. To upload a new dashboard to your CR-4, follow the instructions here.
You can download our custom LED configuration here. Simply save the file, open SimHub, open the LED Profile Manager and import the new profile.